Some tips on who to bring for Raids 🙂
Currently I’ve only completed Tier 4 but the boss fights are more or less the same thus far. Will update this if there’s a difference at higher Tiers.
Crafting Mats Drop
| Map | Items | Crafting Set |
| Gigantus’s Pirate Fleet | – Giant Shark Fin – Gigantus’s Pirate Fleet Loot |
– ATK Boost Set Weapon and Armor – Recovery Rate Boost Set Acessory |
| Daybreak Exodus | – Cyclops Tooth – Daybreak Exodus Loot |
– Crit Rate Boost Set Weapon and Armor – DEF Boost Upon Block Set Accessory |
| Queen’s Palace | – Lizadria Scale – Lizadria’s Front Claw |
– HP Boost Set Weapon and Armor – Received Damage Set Accessory |
| Dunfrost Fortress | – Icicle Blade – Dunfrost Fortress Loot |
– DEF Boost Set Weapon and Armor – ATK Boost Upon Crit Hit Set Accessory |
| Dimensional Rift (8-Player Raid) | – Archedemon Shard – Dimensional Rift Loot |
– Cooldown Decrease Set Weapon and Armor – All Damage Boost Set Accessory |
4-Player Raid (Single)
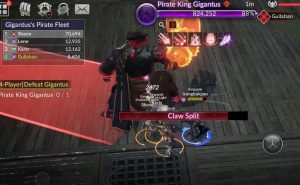
Gigantus’s Pirate Fleet
| Recommended Character | Details |
| Magical Engineer Guilahan | Increase Burn Resistance |
| Lene | “Break” Pirate King’s ultimate attack |
| Best ST DPS character | Melee preferred |
| Saint of Light Karin | Heals + Resurrect + Status Resistance |
| Boss Skill | Description |
| Single Shot | After casting for 4.1sec, deals damage equal to 350% ATK to all enemies in a circular range around the target. 47% chance to burn. |
| Multiple bombing | After casting for 3.6sec, calls in 4 bombardments to deal 350% of ATK to all enemies in a circular range around the caster. 47% chance to burn. |
| Fire Spray | Deals damage equal to 150% ATK to all enemies within a donut-shaped range around the caster. 47% chance to burn. |
| Rum Explosion | After casting for 4.1sec, deals damage equal 350% ATK to all enemies within a circular range around the caster. 47% chance to burn. |
| Giant Claw Press | Ultimate Skill – Deals 1400% ATK to all enemies. |
| Claw Split | Rushes forward after casting for about 4 sec. Follow up with a circular smash after stopping. |
| Come out Everyone! | Calls out kamikaze minions that will explode 3 sec after contact |
The Pirate King can be one of the easier raids if you have the 3 important characters, Guilahan, Lene and Karin. All of his attacks has a chance to deal “Burn” thus it is important to stack up your resistance.
The Pirate King has 3 normal AOE attacks; a straight line, a semi-circle and a circle. You can avoid the first 2 AOE attacks by moving your tank and back-face the boss away from the team. For the circle AOE attack, you have about 2.5 seconds to move your team away from it.
Skills to note:
Claw Split – Since most of his other skills have a long casting time, you can easily avoid them by moving your team out of the telegraph. However, for the hidden skill – Claw split, the Pirate King will immediately follow up with a circular smash after charging forward. Remember to control your team and do not let them auto move forward.
Giant Claw Press – Pirate King’s ultimate skill which can be broken with both versions of Lene. Since there’s a 4.1 sec casting time, you can let your team do more damage for the first 3 seconds before interrupting it at the final second.
Daybreak Exodus
| Recommended Character | Details |
| Recluse Rudy | “Break” Varion’s ultimate attack |
| Best ST DPS character | High move speed preferred |
| Best ST DPS character | High move speed preferred |
| Saint of Light Karin | Heals + Resurrect + Status Resistance |
| Boss Skill | Description |
| Destruction Sword Smite | Deals damage equal to 75% ATK to all enemies within a circle (target). 47% chance to paralyze. |
| Dark Release | Deals damage equal to 150% ATK to all enemies within a circle (caster). 47% chance to paralyze. |
| Grasp of Destruction | Deals damage equal to 75% ATK to all enemies within a circle (target). 47% chance to paralyze. 100% chance of pulling the target. |
| Illusion Charge | After casting 3.6 sec, deal damage equal to 350% ATK to all enemies in a straight line ahead of caster. 47% chance to paralyze. |
| Gust of Doom | Deals damage equal to 40% ATK to all enemies within a circle. 5000% chance to paralyze. |
| Deadly Impact | AOE damage in a circle around Varion. |
| Charge | Charges forward in a straight line. |
| Blue Sword | Plants 3 swords in the middle of the arena that will pull and damage target within its area. |
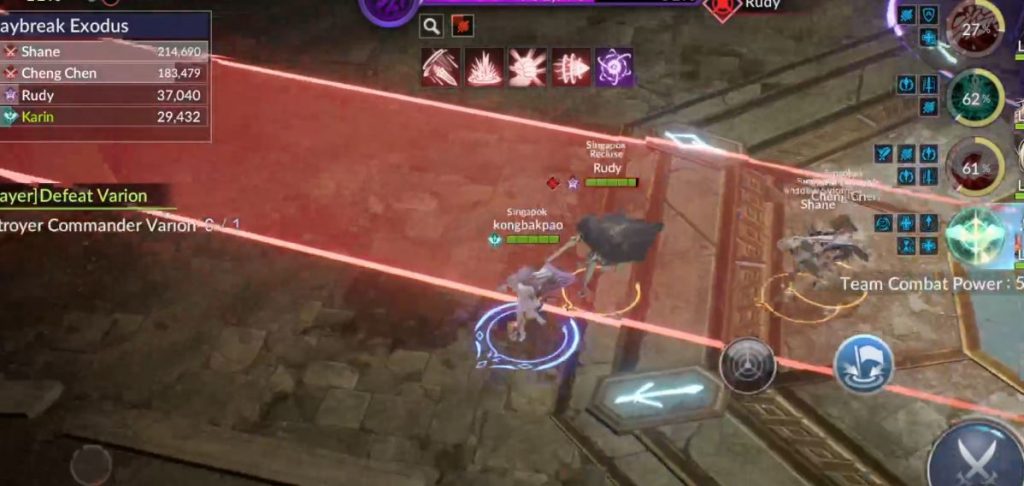
One of the most irritating raid boss ever especially if you are fighting with a lower Combat Power. Number 1 tip for this boss; RUN AND AVOID SHIT on the floor. There will be tons of telegraph on the floor for you to avoid. Make sure you avoid all of them or your characters will have a high chance to get paralyze. I suggest the controls to be on Karin as she is most unlikely to get hit by paralysis.
Make sure your DPS is fully decked out with damage as the fight require a lot of movements, you do not have a lot of opportunity to damage the Boss. There is an enrage timer of about 4.5 minutes thus you need to move fast and know where to move in order to do the most amount of damage.
First, avoid the middle of the arena as Varion will plant 3 swords in the middle that will pull, damage and paralyze your characters.
Try to fight the at the side of the arena and back face the wall so that when Varion charges, you do not have to move over a long distance and can quickly go back to hitting him again. When Varion is using Charge or Illusion Charge, run out of the telegraph and run towards where he’ll stop at the end. This way, you can save some precious time to continue DPS.
This is a movement and DPS race so good luck!
Queen’s Palace
| Recommended Character | Details |
| Universal Character | With decent DPS and DEF |
| Rachel | Break Lizardria’s Ultimate Skill |
| Best ST DPS character | High move speed preferred |
| Saint of Light Karin | Heals + Resurrect + Status Resistance |
| Boss Skill | Description |
| Poisonous Breath | Deals 150% ATK damage to enemies in a straight line, 35% chance to poison target. 100% chance to knock back target |
| Poison Spray | Deals 300% ATK damage to enemies within a fan-shaped in front of caster. 35% chance to poison target. 100% chance to knock back target |
| Hunt Down Prey | Deals 150% ATK damage to enemies in a straight line, 35% chance to poison target. 100% chance of pulling the target |
| Toxic Stinger Sting | Deals 300% ATK damage to target. 35% chance to poison the target |
| Gorge | After casting for 4.5sec, deals damage equal to 350% ATK and recover HP (~15%). |
| Poison pool | Cast a purple pool around the caster. Deal DOT when standing on purple circle |
| Enhanced Lash | Similar to “Poison Spray”, however, you only have a “PIE-shaped” space behind the boss to stand for safety |
Easy boss made difficult if you do not have Rachel in your party. This is a DPS race as the fight requires quite a bit of movement while the Boss has more HP than the others. To make things worse, Lizardria’s Ultimate move will heal it for about 15% of its HP. You’ll probably hit the Berserk timer if you do not have the damage to finish it.
One way to solve the “Rachel” problem is to include a high damage Universal character as your tank. Hopefully you can out-damage its heal. Pray it doesn’t use its ultimate move more than once.
Fortunately, you will unlock Rachel for free once you’ve hit Tier 22 of your Account Combat Power.
Dunfrost Fortress
| Recommended Character | Details |
| Royal Blood Adel | Freeze Resistance |
| Shane (both version) | Break Boss’s Ultimate Skill |
| Best ST DPS character | High move speed preferred |
| Saint of Light Karin | Heals + Resurrect + Status Resistance |
| Boss Skill | Description |
| Frozen Blast | After casting for 3.8 sec, deals 350% ATK damage to all enemies within a circle (target). 39% chance to freeze. |
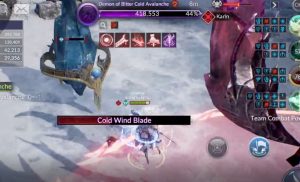
| Cold Wind Blade | After casting for 4.2 sec, deals 350% ATK damage to all enemies in a circle (boss). 39% chance to freeze |
| Chilling Wave | Deals 150% ATK damage to all enemies in a straight line. 39% chance to freeze |
| Icebreaking Spike | After casting for 4.2sec, deals 350% ATK damage to all enemies in a circle (boss). 39% chance to freeze. 100% chance to knockback. |
| Tyrant’s Footstep | After casting for 4.3sec, deals 1400% ATK damage to all enemies within a circle (boss). 39% chance to freeze. |
| Charge | Charge forward in a straight line |
| Essence of Cold | Summons 2 beacons that will pulse in a large area. Chance to freeze |
| Frosthell | After casting for 4sec, spikes will be randomly form in the arena. Move away from any red circle. |
Probably the easiest Raid boss especially if you already train up your Shane (why haven’t you). Look carefully at who the boss is targeting and try to tank away from the other party members. Move away from red circles as much as possible as getting caught frozen in one of its channeling skills can be deadly.
Having Adel as your tank can greatly prevent your team from getting frozen. As most of us are using Shane as our main ST DPS, the fight is really easy especially if the Boss consistently uses its Ultimate move.
The skill you should look out for is “Essence of Cold”. The boss will summon 2 Crystal beacons on the map and it will start pulsing. The pulse will have a chance to freeze your character(s). Quickly take down the crystals as the boss will be casting a lot of AOE damage during this time.
8-Player Raid (Single)
Dimensional Rift
Recommended Party – 1 Tank, Karin(heal), Support healer(optional), DPS x 5
| Boss Skill | Description |
| Abyssal Veil | Saleos Hides beyond the dimension and summons Saleos’s Sword and the Delusion of Dimensions. Destroying Saleos’s Sword grants the hero Damage Immunity. Deals 1500 ATK damage after 10 sec of casting. |
| Fear of Abyss | Saleos hides beyond the dimension and summons the Fear of Abyss. The Fear of Abyss appears at a random spot. After casting for 3.7sec, deals 350% ATK damage to enemies within a circle of target. 30% chance to instill Fear. |
| Wave of Darkness <Tier 4 onwards> |
After casting for 4.5 sec, deals 350% ATK damage to all enemies in a donut-shaped range around caster. 33% chance to knock down. (Combo) After casting for 4.5sec, deals 350% ATK damage to all enemies in a circular range around caster. 33% chance to knock down |
| Segmentation <Ultimate> |
After casting for 3.9sec, deals 2500% ATK damage to all enemies in a fan-shaped range in front of the caster. 100% chance of knocking down the target. |
To be updated.


